Tuesday, July 31, 2007

Building the Prototype

This week we hope to have the instrument built.

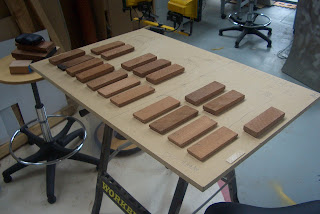
We decided that the most practical and accessible design would be to incorporate the instrument into a hinged box.
The below figure demonstrates this idea.


The main piece of timber that will contain the piezos needs to be solid and firmly attached to the box without any rattling (so as not to trigger the wrong sensor).

I've arranged for a carpenter to build box.
Below are dimensions I'll be providing him.


Stay tuned for more...

Monday, July 30, 2007

Tuesday, July 17, 2007

Technical Advice - David Merrill MIT MediaLab

Last week we contacted David Merill, an MIT PhD student who Dave met on a visit to the MediaLab Boston in March. We asked him for technical advice on implementing our prototype.

He advised that for interfacing percussive sensors to a computer, we could probably get by with multiple Arduinos if we sample quickly enough, or build a little pulse-stretching circuitry for our sensors. There is a growing community of Arduino users out there, so we'd likely be able to find someone who's already done something like what we're after. He advised that there are commercial interfaces that are designed specifically to detect impacts, such as the DM5 from Alesis ,but those would probably be more expensive.

He advised also that we'd be better off using Piezos rather than FSRs to detect impact, since they are more sensitive to percussive gesture. FSR might be better suited to aftertouch, or more long time-scale actions.

He also recommended we only use one sensor per bar because if we have a rigid bar, we're likely to get a similar signal from each sensor if we place multiple piezos on it, so a single one may be enough. this is worth testing to see what works best.

In terms of sound, he advised that mapping gesture to sound is where the real "art" of making a musical interfaces comes in - it's simultaneously the most important element of the design, and the one that is the most difficult to offer good advice about.

His final piece of advice was try lots of different possibilities, work with other people to get feedback along the way (especially musicians), and make sure the instrument remains nimble. ( i.e. able to start and stop sounds quickly, and able to expressively shape sounds in some way)

Thanks to David Merill!

Chris H

User Requirements - Oyvind Brandtsegg

Last week we contacted composer and musician Oyvind Brandtsegg to gather his thoughts and advice on our thesis. Oyvind's interest is in the dsign of custom musical instruments with computers using sensor technology. He's also a vibraphone and marimba player, among other things. He was very keen to lend his advice.

He currently uses a Marimba Lumina(http://www.buchla.com/mlumina/index.html), and he's quite happy with it. He has it customized for lower latency but the only things he's not quite happy with is that it doesnt allow for heavy hitting. He feels that the marimba doesnt always need to be hit hard but he would like to sometime use the full dynamic range. Myself and Dave feel that heavy hitting is not something we are very concerned with in our prototype.

He then went on to describe his Marimba Lumina in more detail, describing the customisation of the 4 mallets.
" * I let each mallet send on a separate midi channel, and I let each
mallet send a midi control change message (I use contr numbers
1,2,3,4, but it could be any control change message).
* The control change is sent on relative movement along the tone bar,
much like a midi fader. Relative movement is most comfortable for me,
as I can hit the tone bar in any location and move from there to send
control change. All midi are routed to Csound in my laptop, I will
tell more about how the controller messages are used later.
* I have also set up the ML so that the length of the midi note event
is longer if I hit the tone bar at the end far away from me, and more
staccato if I hit the end of the tone bar closer to me.
* The ML has 5 pedal inputs, and I use one for sustain (normal midi
keyboard sustain). I use another as a regular midi expression pedal,
sending midi control messages on ctrl no 7. I use a third pedal to
transpose mallet 1 down one octave, and at the same time mallet 4 up
one octave (this greatly extends the pitch range of the instrument and
also is nice when playing chords with a "bass note" and a "melody
note"). I use a fourth pedal as a "mono" switch: setting mallet 1 to
be monophonic, mallet 4 to be monophonic, and mallets 3&4 to be
"combined monophonic". Is the mono mode I can then play only 3
simultaneous notes, but I do not have to worry at all about damping.

Csound:
I use csound as my only sound source for live applications and I have
a collection of instruments (vibes, marimba, clavinet, mellotron,
analogsynths etc). Normally the control change from mallet 4 will act
as pitchbend up (but only on the notes played by mallet 4, all notes
played by other mallets are not bent). Control change on mallet 3 are
pitchbend up for all notes regardless of what mallet did play them.
Control change on mallet 2 act as pitchbend down on all notes, and
control change on mallet 1 act as a "expression" parameter (e.g.
filter cutoff frequency, ringmodulation amount, or other timbral
variation).
The ML also has some extra "pads" that can be used as midi notes. I
have assigned these pads to different control functions, e.g. start or
stop recording, start or stop a sequencer master clock, turn on/off
algorithmically generated voices and so on.
I use an assortment of extra expression pedals (5 or 6) to control
effect sends etc, these pedals are connected to a Roland FC200 (I
think that's the model number, I do not have it here right now) which
I also use for patch change (instrument change).

I have experimented with using different timbres on the different
mallets, but I do not use that a lot."

Also added that he doesnt know of any cheaper instruments. As far as alternatives to the ML goes he mentioned the MalletKat and the Xylosynth but these dont differentiate between mallets like the ML.

Thanks to Oyvind for more than enough information.
He hopes to be over in November for the Sounds Electric Conference.

Chris H

Meeting with Mikael - July 12th

For this meeting we met in the IDC lab.

Mikael gave us fsrs to use but we were not quite sure how to connect these to the arduino as they had no wires, only adhesive backs (used for Ztiles project). We felt it could be complicated to do this so we decided to stick with using Piezos. On testing the Piezos we felt they had sufficient sensitivity. Marc McLoughlin used these on his thesis artefact last year so we have someone with experience who could offer us advice. Mikael mentioned it's just a matter of adjustment(such as tweaking threshold) to get the right response from the sensors. He advised we test outputting sounds with two sensors before we go any further. He also advised that 8 sensors on the one arduino may require we lower the threshold value. Only after 8 sensors working fine off the one arduino should we start to build the physical surroundings for the instrument.

We showed Mikael the wooden prototype Dave put together to give an ideas of ahape and dimensions.

Mikael recommended possibly using an adhesive lino backing for the instrument(similar to Ztiles approx 3mm thick, to absorb the pressure), and also placing a strip of adhesive lino over each sensor. He warned that hitting one bar could trigger a sensor from a different bar.

Major advice from meeting - start outing sounds from sensor hits asap!

Pressure detected!

After our meeting with Mikael last Thursday, we decided it would be best to use Piezo transducers rather than force sensitive resistors. Firstly, the ones that Mikael had were wire-free, complicated to connect to an arduino. Secondly Marc McLoughlin used piezos on his bodybeats project last year and he may be helpful if we encounter difficulties. Also, after testing the Piezos on an oscilliscope we feel they should be more than sufficient for the sensitivity we are looking for.

And onwards we went. On connecting to the Arduino I realised that a threshold of 250 was good to detect sufficient force on the sensor. On successfully connecting numerous sensors, we began looking at how we could interface this with PD to output synthesized sounds. To create the sounds we needed to use the modal partial frequencies of our 2 octaves.
One resource that can give us information on this is Rossings 'The Science of Sound'.

Next: compose and output sounds using Pure Data
PDuino firmware downloaded and installed, the Simple Message System will be used to read the arduino

Chris H

Wednesday, July 11, 2007

Let's get started!

Recently we began building the prototype. I obtained an arduino kit from the IDC and ran a simple LEdBlink program to test it worked on my MacBook.

Waiting to get my hand on some force sensing resistors, I decided to test out Piezos sensors using a simple Knock program that gives back a reponse when the sensor is hit.

In total we will need 3 arduino - 3 x 8 analog inputs - 24 bars = 2 octaves

As soon as we have fsrs connected we will interface arduino with Pure Data using PDuino. PDuino download can be found at http://www.arduino.cc/playground/Interfacing/PD

Also in the mix at the moment is the physical construction of the prototype. We are looking at a wooden base and foam pads for the bars.
Stay tuned for more...

Chris H

Tuesday, July 10, 2007

Robert Moog

Today I watched 'Moog' a documentary film by Hans Fjellestad. An excellent film that looks inside the mind of Robert Moog - 'the godfather of synth', best known as the inventor of the Moog synthesizer.

The first Moog instruments were modular synthesizers. In 1971 Moog Music began production of the Minimoog Model D which was among the first widely available, portable and relatively affordable synthesizers. Through his involvement in electronic music, Moog developed close professional relationships with artists such as Don Buchla, Keith Emerson, Rick Wakeman, John Cage, Gershon Kingsley, Clara Rockmore, and Pamelia Kurstin. In a 2000 interview, Moog said "I'm an engineer. I see myself as a toolmaker and the musicians are my customers. They use my tools."

In the documentary, Mood defines the Minimoog's users as experimental musicians, but also quite often, producers of commercials. He explains how he began making interesting sound sequences, the general public got used to evocative commercial sounds, and keyboard instruments.

He defines synthesis as to put together something whole from all of its parts.
He questions whether a electronic musical instrument needs to take the form of a keyboard. He also stresses that all his instruments are designed for performance to play live for an audience - forming a community between musicians and audience.

Documentary ends in Japan where Moog meets many fantastic graphic designers. Moog talks about the interactive properties of musical instruments. 'Why do you feel at one with your musical instrument'. He mentions the communicative property of musical instruments and hints that this could be taken further through graphical representations of sounds. (something we hope to achieve in our prototype)

Monday, July 9, 2007

Possible Capabilities of Multimba

Through months of research so far, we have looked at several possible capabilities for our instrument:
-Velocity and pressure sensitivity
-Creating vibrato or pitch bend by mallet along bar
-Reversing notes - it would be interesting to see how music might sound when bars are reversed.
-Multi-instrumental
-Ability to create dynamic graphical representation of the sound produced.
With further research we hope to discover other potential functionality we could include.